Publishing Guide
Publishing is the act of creating, securing, and documenting a data item in Campus Data. (See Campus Data Basics.) This guide assumes you have the authority to publish data items. This role must be granted by the team administrator.
Creating a Data Item
To get started, select Publish from the main left navigation menu and complete the form:

- Team: Select your team (See Team Setup Guide.)
- Format: Select the appropriate format
- Topic: Select the appropriate topic
- Tags: Add any tags that will aid users in finding the item during a search.
- Name: Follow the naming guideline established for your team. (Example: Human Resources: Sample Dashboard)
- Brief Description: Provide a brief description. This appears at the top of the item page with the title. It also shows in expanded list views.
- If the Item is in test, check the box next to "Flag as test item"
- Select how you will provide the content:
- External Link - link to a URI outside of Campus Data. Enter the URL of the page you want to publish.
- SSRS: https://iowareports2019.iowa.uiowa.edu/ReportServer?/TopFolder/SubFolder/ReportName&rs:embed=true
- Additional URL configuration options (NOT REQUIRED): &rc:LinkTarget=_blank&rc:showbackbutton=true
- PowerBI Report Server (On Prem): https://iowabireports1.iowa.uiowa.edu/reports/powerbi/TopFolder/SubFolder/Report%20Name?rs:embed=true
- PowerBI Premium (Cloud): Use the App URL provided by PowerBI when you open the app and select File > Embed Report > Website or portal
- Additional URL configuration options (NOT REQUIRED): Use &navContentPaneEnabled=false to turn off tabs across the bottom
- Any HTTPS site that allows embedding can be used. You cannot use sites that are not HTTPS or site that do not allow embedding. (By default, SharePoint does not allow itself to be embedded.)
- SSRS: https://iowareports2019.iowa.uiowa.edu/ReportServer?/TopFolder/SubFolder/ReportName&rs:embed=true
- Internal Link - upload a file to Campus Data.
- Text files, PDF's and Images can be displayed inline.
- Links to SSRS reports on servers can be displayed inline if the URL is properly formatted.
- External Link - link to a URI outside of Campus Data. Enter the URL of the page you want to publish.
- Select how you want to display the item:
- To force the content to open in a new window/tab, select "This data item content must be shown in a new window/tab."
- To have the content to open INSIDE Campus Data, leave that checkbox UNCHECKED
- Click Create Data Item button
- NOTE: This creates an item in the Campus Data catalog which will remain private until you change the security rules.
Documentation
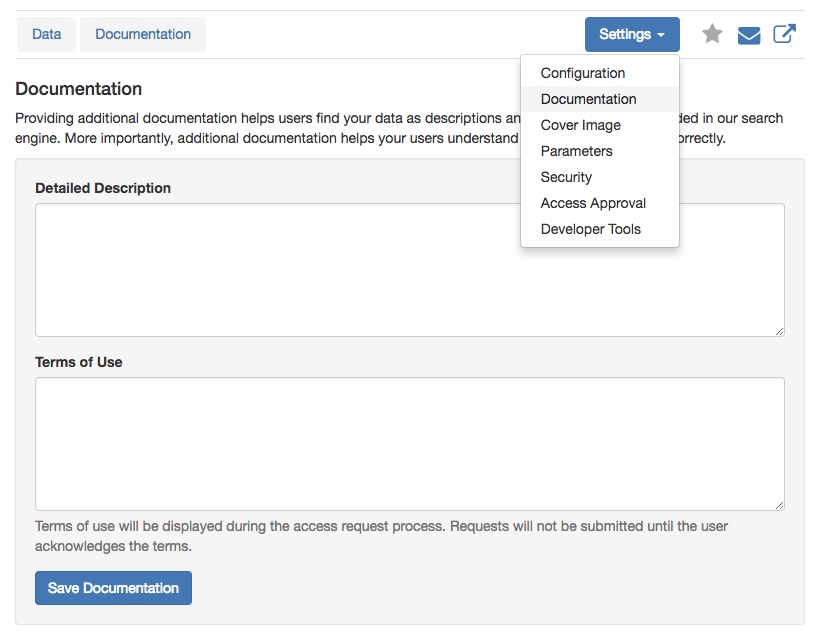
- From the Settings menu, select Documentation
- Enter a detailed description
- Talk about what questions the item is trying to answer and discuss any assumptions that were made in presenting the data.
- The description can be formatted, if desired, using "Markdown" (Click HERE for a markdown cheat sheet.)
- Terms of Use
- If you have many data items that share the same Terms of Use and the items are secured with a Campus Data Team Group, consider leaving Terms of Use blank here and entering it on the Campus Data Team Group. (Less overhead when TOS change.)
- You can also enter the Terms of Service here or leave them blank if you do not have Terms of Service.
- Click the Save Documentation button
- Under External Documentation, add a link to the FAQ, Data Dictionary or any other documentation related to the data item
Cover Image (Optional)
Adding a cover image provides users who find the data item in a search a "thumbnail" preview of what they can expect to see if they access the data item. Although optional, this step is highly recommended, as it can be very beneficial in assisting a user when making a decision whether or not he or she should request access for a data item.
- From the Settings menu, select Cover Image
- Using a screenshoting tool (e.g. the Snipping Tool in Windows), take a screenshot of the data item you're publishing.
- Using the image-editing tool of your choice, re-size the image. A width of 500-550 pixels is a good rule of thumb.
- Upload the image
Security

To configure an item’s security rules, select Security from the Settings menu. There are four ways to configure security for a data item.
- This data is private - data is available only to the publisher and team administrators. Other team members who are not administrators cannot see the data item.
- This data is available to team members - data is available only to the team members of the team in which the data item is published.
- This data is available to team members and campus users according to the rules below - this is by far the most common (and most flexible) security setting. Publishers can configure a data item to be secured to a wide range of combinations of AD Groups, Team Groups (AD Groups administered by a Campus Data Team), Campus Data Team Members, MAUI Roles, etc.
- Be sure to select OR if you want anyone who is in any one role to have access. If you select AND, the person must satisfy ALL of the specified rules.
- The "Estimated number of people who can access this data" counter in the blue box provides an estimate of the number of people with access.
- This data is available to all of campus (anyone who can log in) - just like it sounds, as long as you've logged into the UIowa network, you can see the data item.
Note: The security setting in Campus Data can NOT control how security is configured for external links (see "Select how you will provide the content" in STEP 1). For example, if the Campus Data data item points to a report that lives on an SSRS server, the report administrators must still configure security on the SSRS server.
More Options
-
Discoverable - this check box controls whether or not someone who does NOT meet the security outlined in the section above can find the data item in their search results. UPDATE: As of Aug 27, 2020 it is no longer required that this checkbox is checked in order to use the automated access approval workflow described in STEP 5.
-
FERPA Training Required - if this check box is checked, during the automated access approval workflow, a user's FERPA training status will be validated prior to allowing them to submit an access request. (More About FERPA.) Campus Data will also check FERPA when a user attempts to view an item.
Access Approval
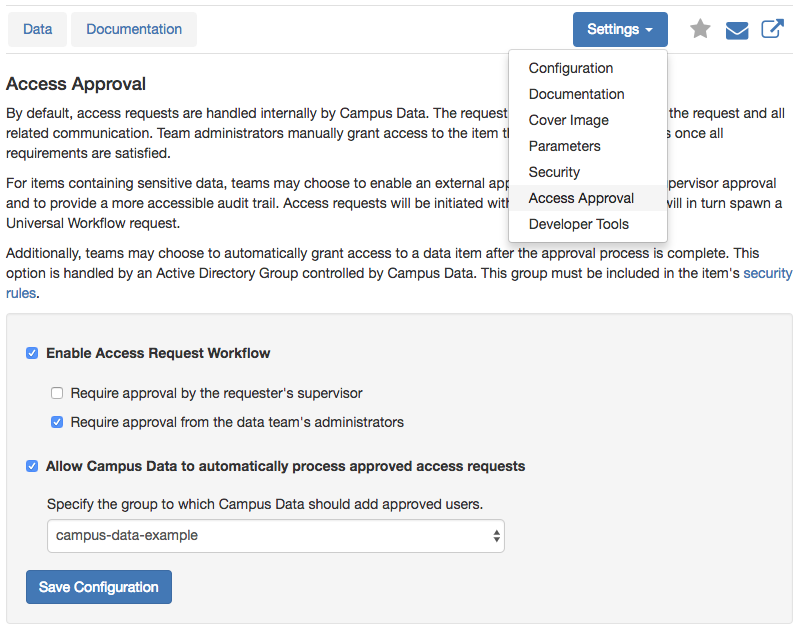
By default, access requests are handled internally by Campus Data. The request system is used to record the request and all related communication. Team administrators manually grant access to the item through existing processes once all requirements are satisfied.
Enabling Access Approval allows publishers to automate approvals for data items secured by team groups. Access requests are initiated within Campus Data, but can thereafter be handled via Universal Workflow.
NOTE: If the item is not discoverable, users will only reach the request form if they are sent the link by someone via invite or email.
- From the Settings menu, select Access Approval
- Checking the box next to Enable Access Request Workflow directs the request access process through the Campus Data interface with Universal Workflow.
- Select "Require approval by the requester's supervisor" to require approval by the requester's supervisor.
- Select "Require approval by the requester's skip level supervisor" to require approval by the requester's supervisor's supervisor.
- Select "Require approval by an institutional actor" to require approval by someone in an institutional role (such as a business officer).
- Select the check box for Require approval from the data team's administrator / support roles.
- Select the check box for "Allow Campus Data to automatically process approved access requests" if - after all approvals noted above - you want Campus Data to automatically add the user to the selected team group.
- From the drop down, select the same team group you configured on the Security page.
- Click the Save Configuration button